How To Pack A Camping Kitchen
A practical step-by-step guide to how to pack a camping kitchen, including preparation, instructions, common issues, tips, and next steps.
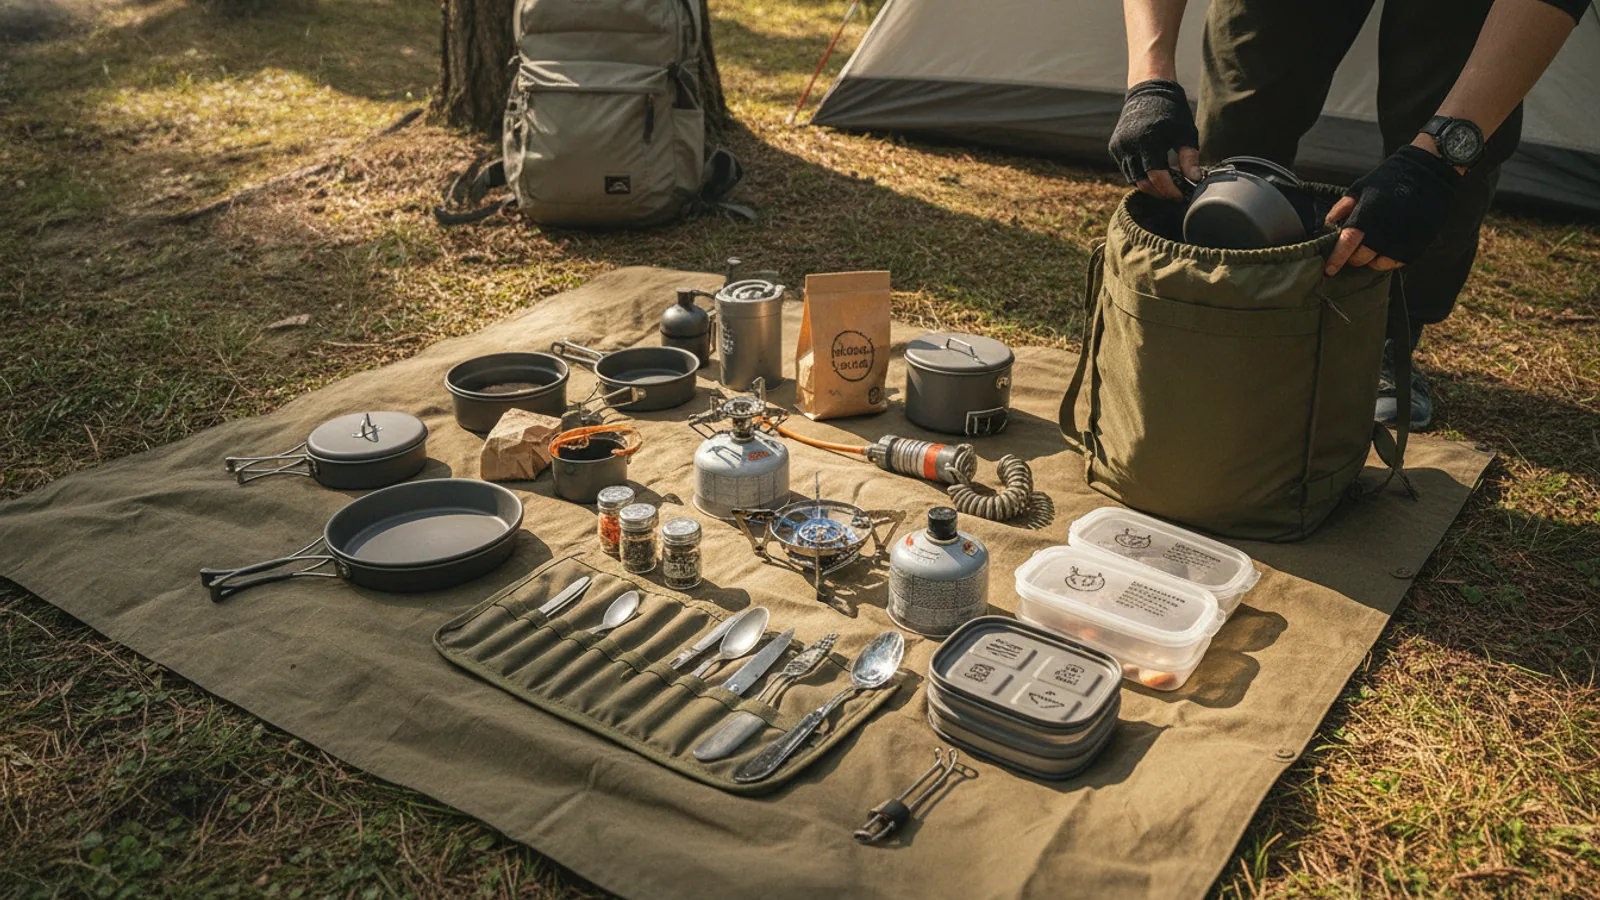
How To Pack A Camping Kitchen
This guide explains how to approach how to pack a camping kitchen, including the preparation, practical steps, common mistakes, and final checks that help you finish with confidence.
Before You Start
Before you begin packing your camping kitchen, it's crucial to gather everything you might need and consider the specifics of your trip. This preparation prevents last-minute scrambles and forgotten essentials.
Step-by-Step Instructions
Quick Reference
Common Problems When You Pack A Camping Kitchen
Even with careful planning, issues can arise. Knowing common problems and their solutions can save you time and stress on your trip.
Forgotten Essentials
Problem: You arrive at camp only to realise you've forgotten the matches, the can opener, or the coffee! This is one of the most common frustrations.
Fix: Use a detailed packing checklist and physically tick off each item as you pack it. Try using a 'last-minute' box for items you can only pack just before leaving (like fresh food from the fridge) and keep it by the door.
Leaking Liquids or Food
Problem: A leaky bottle of oil or a poorly sealed food container can quickly make a mess, contaminating other items and attracting pests.
Fix: Always double-bag any liquid items in robust, sealable bags. Use high-quality, airtight containers for food. Store liquids upright and, if possible, in a separate, easily cleanable section of your storage box.
Disorganised Chaos
Problem: You spend ages rummaging through a jumbled mess of pots, pans, and ingredients trying to find what you need for each meal.
Fix: Stick to the categorisation method. Use separate bags or smaller containers for 'cooking tools', 'eating utensils', and 'cleaning supplies'. A dedicated 'chuck box' with compartments can greatly improve organisation for car camping.
Too Heavy or Bulky
Problem: Your kitchen bag is unwieldy, making it difficult to carry or fit into your vehicle/pack.
Fix: Be ruthless with what you bring. Ask if an item serves multiple purposes. Can one pot do the job of two? Re-package food into smaller, lighter containers, removing excess packaging. Consider dehydrated or freeze-dried meals to save weight and space.
Attracting Wildlife
Problem: Food odours or poorly stored rubbish can attract animals to your campsite, which can be dangerous and disruptive.
Fix: Never leave food or food scraps unattended. Store all food and scented items (like toiletries) in airtight, animal-proof containers, ideally in your vehicle or a bear-resistant locker if available, well away from your sleeping area. Pack out all rubbish promptly.
Advanced Tips for How To Pack A Camping Kitchen
Once you've mastered the basics, these advanced tips can elevate your camping kitchen experience from functional to truly efficient and enjoyable.
Embrace the 'Chuck Box' System
For car camping, a dedicated, sturdy plastic container or a custom-built wooden 'chuck box' is a game-changer. This box houses all your non-perishable kitchen essentials (stove, pots, utensils, dry food, cleaning supplies) permanently. It means you only need to grab the box, add your cooler, and you're ready to go. Organise it with dividers or smaller containers inside for ultimate efficiency.
Pre-Cook and Dehydrate Meals
Save significant time and effort at the campsite by preparing meals or components at home. Cook and dehydrate ingredients like ground meat, vegetables, or sauces. These lightweight additions rehydrate quickly and dramatically cut down on cooking time and washing up in the field. This also reduces the amount of fresh food you need to keep cold.
Utilise a Gravity-Fed Water System
For longer trips or group camping, a large water bladder with a built-in filter and a hose can act as a gravity-fed water dispenser. Hang it from a tree branch, and you have instant access to filtered water for drinking, cooking, and washing without needing to pump or carry individual bottles constantly. This is a real luxury for campsite convenience.
Create a "Micro-Kitchen" for Quick Stops
In addition to your main kitchen setup, consider a small, easily accessible 'micro-kitchen' bag. This contains just the essentials for a quick hot drink or a simple snack: a small stove, a mug, some tea/coffee, and perhaps a small pot. It's perfect for a roadside stop or when you just need a warming brew without unpacking the entire kitchen.
Invest in Multi-Use Tools
Look for tools that serve more than one purpose. A spork (spoon/fork combo), a pot that doubles as a bowl, or a cutting board that fits inside your pan can save space and weight. A multi-tool with a can opener, bottle opener, and knife is also invaluable, reducing the need for separate gadgets.
Practise 'Leave No Trace' for Food Scraps
Beyond packing out rubbish, be diligent about food scraps. Composting facilities might exist at some organised sites. If not, pack out all food waste, including seemingly harmless items like orange peels or apple cores, as they take a long time to decompose and can attract wildlife. Use a dedicated 'slop bucket' for food waste until it can be properly disposed of.
How To Pack A Camping Kitchen FAQ
Here are answers to some frequently asked questions about packing a camping kitchen effectively.
What's the best type of container for a camping kitchen?
It depends on your trip type. For car camping, a sturdy plastic tote or a dedicated 'chuck box' with a lid is ideal. It protects items, keeps them organised, and can serve as a makeshift table. For backpacking, lightweight stuff sacks, roll-top dry bags, and durable zippered pouches are better for keeping weight down and allowing flexible packing.
How do I prevent food from spoiling in the cooler?
Pre-chill your cooler and all food items before packing. Use ice blocks or frozen water bottles (which also provide drinking water as they melt) instead of loose ice for longer chilling. Pack densely with minimal air space, and keep the cooler in the shade, opening it as little as possible. Separate raw meats from other foods to prevent cross-contamination.
What are the most common forgotten items?
Often, it's the small but crucial things: lighters/matches, a can opener, bottle opener, rubbish bags, sponges, dish soap, or a cutting board. Creating a detailed checklist and visually inspecting your packed gear before you leave can help prevent these oversights.
How can I make my camping kitchen more environmentally friendly?
Reduce waste by re-packaging food in reusable containers, using reusable plates/cutlery, and bringing a washable dishcloth instead of paper towels. Use biodegradable soap and follow Leave No Trace principles for waste and greywater disposal. Opt for a reusable water bottle or larger water container instead of single-use plastic bottles.
How much fuel should I bring for my stove?
This depends on your stove's efficiency, the number of meals, and the number of people. A general rule of thumb for a small group (2-3 people) on a weekend trip might be one small (220g) canister. For longer trips, estimate one small canister per 2-3 days for basic cooking. Always bring a little extra as a contingency and check your stove's specific fuel consumption.
How do I keep my cooking utensils clean while camping?
Wash them immediately after use to prevent food from drying on. Use a small amount of biodegradable soap and hot water if possible. Dry them thoroughly to prevent rust, especially metal items. Keep them in a clean, dedicated utensil roll or pouch to protect them from dirt and keep them separate from other gear.
Final Checklist for How To Pack A Camping Kitchen
Before you head out, run through this final checklist to ensure your camping kitchen is perfectly packed for a safe, efficient, and enjoyable trip.
By following these steps and checks, you'll be well-prepared to whip up delicious meals and enjoy the outdoor cooking experience without any hitches. Happy camping!